
Getting started
Before installation
- Make sure your environment complies with minimal requirements.
- Linux users must install FFmpeg via their OS distribution package manager or build it from the sources on the Download page. The Wiki has some useful guides.
Installation
- Windows users can simply run the downloaded installer and go through the wizard. The Serviio server will be installed as a Windows service.
- Linux users need to unpack the installation package to a desired location.
- Mac users need to unpack the archive and run the installer.
Running the server
Serviio consists of 2 executable files, a server and a console. To start using Serviio do the following:
- Windows - the server starts automatically after Windows start (as a service). Run ServiioConsole to start the console. Alternatively you don't have to start Serviio as a service but use bin/serviio.bat (with the -stop attribute to stop a running instance).
- Linux - run Serviio server with bin/serviio.sh (with the -stop attribute to stop a running instance). To start the console run bin/serviio-console.sh. A Daemon setup guide is available.
- OSX - the server starts automatically after OSX start (as a LaunchDaemon). Run ServiioConsole application to start the console.
You can also access the Console in your favourite web browser, by going to this address:
http://localhost:23423/console
Only one instance of the server can run at a given time on a single machine.
In a case when the machine running Serviio has multiple network cards (NICs) it will try to work out which one is the right one to advertise on. If Serviio doesn't seem to communicate with your device make sure you select the right network card in the field "Bound IP address" in the console. More details here.
Adding content to Serviio's media library
- Open the Serviio console
- Select the Library and then Shared folders section in the menu
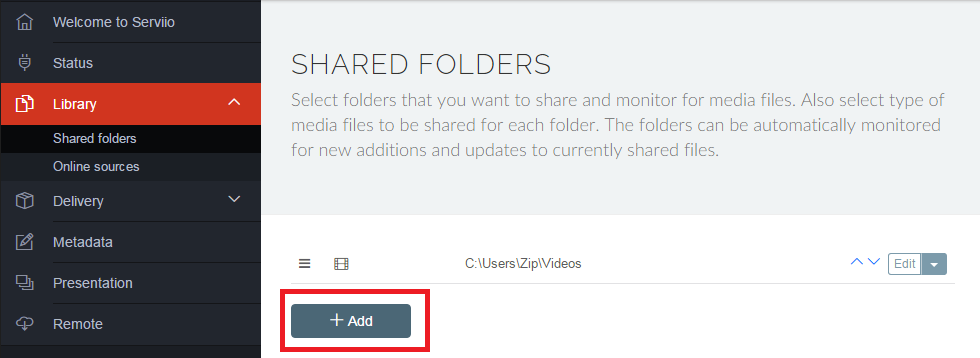
- Add folders that include media files you want to include in the library and pick what type(s) of media files from those folders should be looked for (Video, Audio, Images). You can specify if descriptive metadata (e.g. online metadata, XBMC, Swisscenter, MyMovies) should be retrieved for video files in particular folders, which might be useful to control, for example, metadata of your home videos.
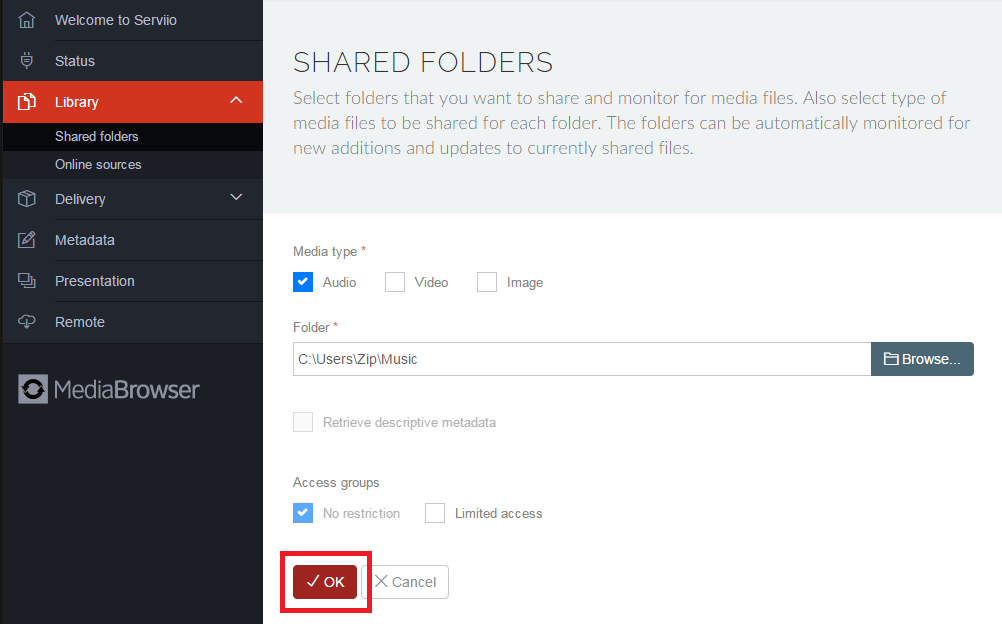
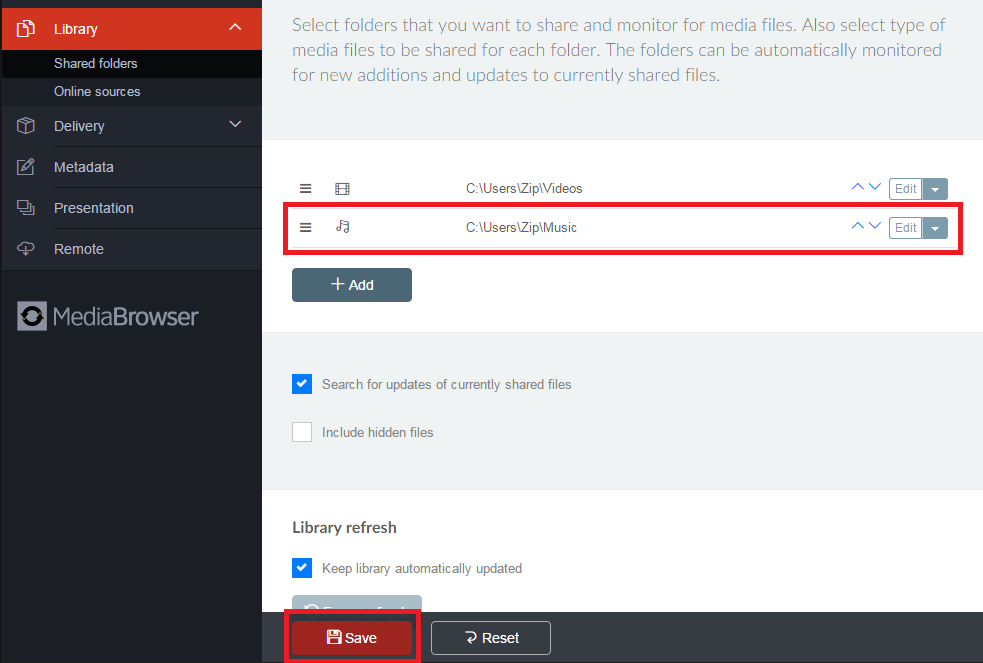
- Click Save to store your new shared folders configuration
- You can fine tune access to the shared content for various users
- You can also add online resources to the library
- Click the Save button when you are done.
- The library will now be updated and then kept up-to-date when Serviio detects new or updated files.
- Note that when you add a large amount of files (e.g. during your initial setting up) it might take cosiderable amount of time (even several hours) to properly locate metadata for all your files (especially if you are using online sources for metadata searching).
- You can force checking for new or updated files by clicking "Force refresh" button.
- get more information on the wiki
Renderer profiles
DLNA devices sometimes need a little 'tweaking' for them to play all possible supported media formats and for their extra features to be utilized. Renderer profiles take care of this.
Serviio comes with a predefined set of profiles. If your device is not supported yet we encourage the users to try writing their own profile and submitting it back to us so that we can include it in a future release of Serviio. Look here for a short guide on how to add a new profile.
You can select the appropriate profile in the Status section. You will see a list of devices that were found on your network. If your device has been recognized and a proper profile has been determined you can start viewing your content. In other cases you might have to select a profile for the found device, by clicking the Edit button.
All unrecognized devices will default to Generic DLNA profile.
Having trouble?
If you are experiencing difficulties with your setup, please check the Support Forums and Users Knowledge base. You can also have a look at Sony UK instruction video or read TechRadar's or APC mag's guides.